1. 개발환경
- 개발환경 : AWS EC2 Ubuntu22.04 / Java1.8 / Maven3.8.1 / Tomcat8
- jenkins설치방법은 아래링크참고
- https://arckwon.tistory.com/entry/AWS-EC2-Ubuntu-Jenkins%EC%84%A4%EC%B9%98-jenkinswar
[AWS EC2] Ubuntu에 Jenkins설치하기 (jenkins.war)
ubuntu 몽고디비설치 https://arckwon.tistory.com/13 ubuntu 메이븐설치 https://arckwon.tistory.com/12 ubuntu jdk1.8 설치 https://arckwon.tistory.com/11 ubuntu nginx설치 https://arckwon.tistory.com/3 1. 설치전 ec2 ubuntu 20.04 jdk1.8.0_361 j
arckwon.tistory.com

2. 주의사항
- java jdk버전과 jenkins버전이 호환되기 때문에 만약 jenkins 설치를 못했다면 (예시 jdk1.8.5 -> jdk1.8.3 다운그레이드) 를 하거나 Jenkins상위버전으로 설치하길바란다.
- maven 3.8.1 이상일경우 HTTP를 막는 설정이 default로 변경 되었다. pom.xml파일의 repository url를 https로 변경해야한다.
3. 플러그인 다운로드
- 왼쪽메뉴 Jenkin 관리 > 플러그인관리
- GIT server

- maven integration

- Deploy to container

- 설치후 재시작

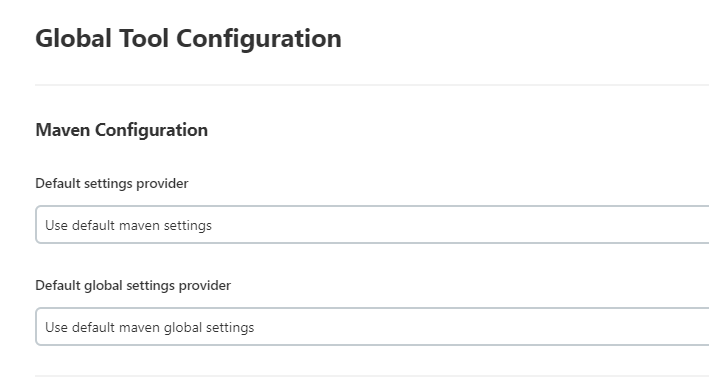
4. 전역설정하기 Global Tool Configuration
- 왼쪽메뉴 Jenkin 관리 > Global Tool Configuration선택

- 해당부분은 아래처럼
- JDK - 설치가 안되어 있을경우 아래참고
- https://arckwon.tistory.com/entry/AWS-ubuntu-jdk18-%EC%84%A4%EC%B9%98%ED%95%98%EA%B8%B0
[AWS EC2] Ubuntu에 jdk1.8 설치하기
ubuntu 몽고디비설치 https://arckwon.tistory.com/13 ubuntu 메이븐설치 https://arckwon.tistory.com/12 ubuntu 젠킨스설치 https://arckwon.tistory.com/8 ubuntu nginx설치 https://arckwon.tistory.com/3 AWS ec2의 ubuntu20.04 에 jdk1.8 설치하
arckwon.tistory.com

- GIT - 설치가 안되어 있다면 아래 명령어 실행
# git설치

$ sudo apt update
$ sudo apt install git
$ git --version

# git경로확인, 아래명령어 입력시 보통 /usr/bin/git 출려됨
$ which git

- maven - 설치가 안되어 있다면 아래링크참고
- maven 3.8.1이상일경우 pom.xml repository url을 http에서 https로 변경해야함
- https://arckwon.tistory.com/entry/AWS-EC2-Ubuntu%EC%97%90-maven-%EC%84%A4%EC%B9%98%ED%95%98%EA%B8%B0
[AWS EC2] Ubuntu에 maven 설치하기
ubuntu 몽고디비설치 https://arckwon.tistory.com/13 ubuntu jdk1.8 설치 https://arckwon.tistory.com/11 ubuntu 젠킨스설치 https://arckwon.tistory.com/8 ubuntu nginx설치 https://arckwon.tistory.com/3 1. 개요 이번 포스팅에서는 aws ec2 u
arckwon.tistory.com

5. Maven 프로젝트
- Maven project 선택

6. General
- 아래처럼작성

- 오래된 빌드는 삭제한다. 삭제하지 않을시 HDD에 계속 war파일이 쌓인다

7. 소스코드관리
- git url 입력

- git계정입력

- 아래처럼입력력

8. 빌드유발
- 아래처럼선택

9. 빌드환경
- 아무것도 하지않고 넘어간다.
10. Pre Steps
- 아무것도 하지않고 넘어간다.
11. Build
- clean install -P prod : prod/dev/local profile분리된 환경일경우
- clean package -D maven.test.skip=true : 전자정부프레임워크일경우
- 웬만하면 clean install로 다처리된다.

12. Post Steps
- 아래처럼

12. Build Settings
- 아무것도 하지않고 넘어간다.
13. 빌드 후 조치
- Deploy war/ear to a container 선택
- 앞단에 Nginx나 Apache 등의 웹서버가 존재하는경우 tomcat의 server.xml의 포트는 8080으로 설정하고 Nginx등의 웹서버가 별도로 없다면 80포트로한다. 즉 tomcat의 server.xml에 설정된 포트를 따라간다.

- Containers 작성을위한 첫번째 작업
- apache-tomcat-8.0.47/conf/context.xml 아래내용추가
<Resources cachingAllowed="true" cacheMaxSize="100000" />
- Containers 작성을위한 두번째 작
- apache-tomcat-8.0.47/conf/tomcat-users.xml 아래내용추가
- 아래 계정정보는 본인이 사용할 계정정보를 입력해야한다.
<role rolename="manager"/>
<role rolename="manager-gui" />
<role rolename="manager-script" />
<role rolename="manager-jmx" />
<role rolename="manager-status" />
<role rolename="admin"/>
<user username="아이디" password="비밀번호" roles="admin,manager,manager-gui, manager-script, manager-jmx,  manager-status"/>
14. 설정끝
- Apply 적용버튼클릭하고 Save 버튼클릭하고 대시보드로 이동
15. 빌드하기

16. 완료된 화면

17. 마치며
- jekins + java + tomcat + maven 버전을 확인해가면서 설치하길 바란다.
- 웬만하면 Global Tool Configuration 설정시 자동설치말고 수동으로 각각 설치하길 바란다.
- 빌드시 대부분 2곳에서 에러가난다. 빌드실패하거나 tomcat으로 war넘어갈때 문제이다.
- 빌드실패시 pom.xml 문제가 대부분이다.
- 본인의 tomcat webapps는 아래와 같다. 빌드성공시 ROOT.war가 생기고 자동 톰캣 재시작될것이다.

- 본인의 tomcat server.xml 의 경우 별도로 바꾸지 않고 그대로 사용한다.

'서버 > sw' 카테고리의 다른 글
| [maven] ubuntu maven 설치방법, 환경변수, 삭제방법 (0) | 2023.08.03 |
|---|---|
| [Tomcat] server.xml 기본배포 및 다중서비스 배포 (0) | 2023.04.17 |

